Configure or Modify Domain Name System (DNS) From the Control Panel or CentreWare Internet Services (CWIS)
- Product support for
- WorkCentre 5945/5955
- Article ID
- KB0139772
- Published
- 2020-02-20
Note: There are different methods that may be used to configure the feature. Select your required method to configure the feature.
Domain Name System (DNS) is a system that maps host names to IP addresses.
To Configure DNS From the Control Panel:
Login to System Administrator mode on the Control Panel. See the Related Content for additional information.
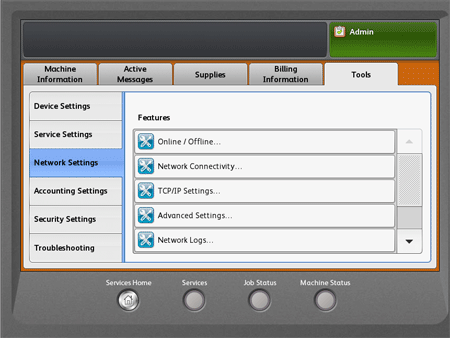
Select Network Settings.
Select TCP/IP Settings.
Select DNS Configuration.
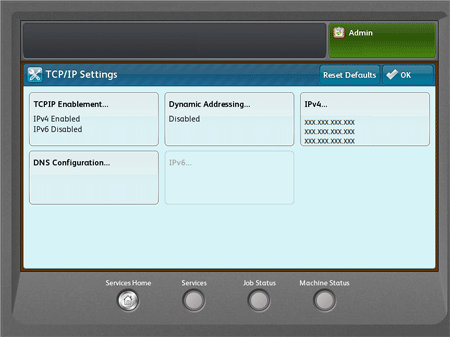
Select Host Name.

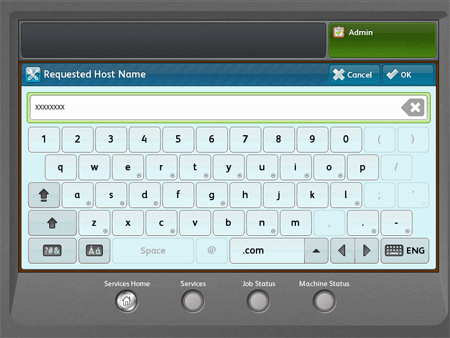
Select the Requested Host Name field.

Enter a host name.
Select OK.
Select Close.
NOTE: if DHCP is enabled, your DHCP server can provide the following information.Select Domain Name.
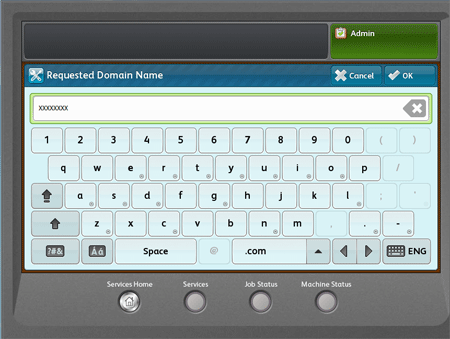
Select the field under Requested Domain Name then enter the domain name using the Touch Screen keypad.
Select OK.
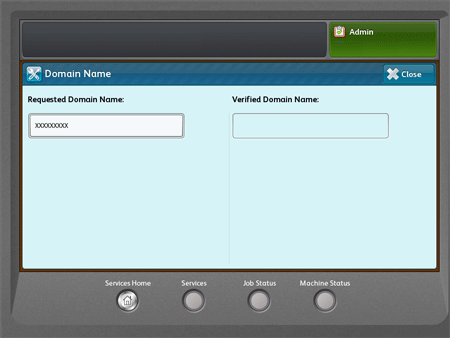
Select Close.
Select DNS servers.
Select Primary DNS Server.
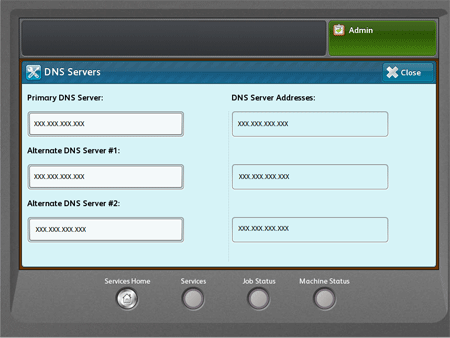
Enter the server address then select OK.

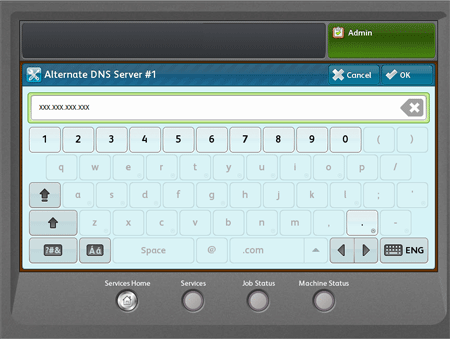
Select Alternate DNS Server #1.
Enter the server address then select OK.
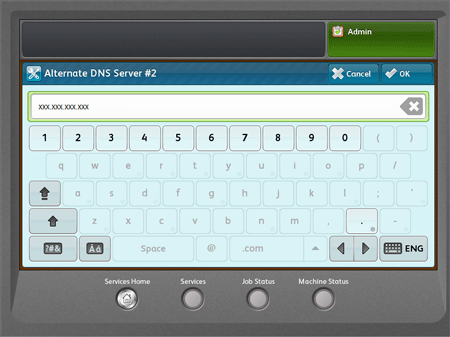
Select Alternate DNS Server #2.
Enter the server address then select OK.
Select Close.
Logout of System Administrator mode. See the Related Content for additional information.
To Configure DNS Using CentreWare Internet Services (CWIS):
Access CentreWare Internet Services (CWIS) and if necessary, login as System Administrator. See the Related Content for additional information.
Click on the Properties tab.
Click on Connectivity on the left side of the screen.
Click on Setup. The Connectivity screen will be displayed.
Click on Edit from the Wired Connection section located under the Network section.
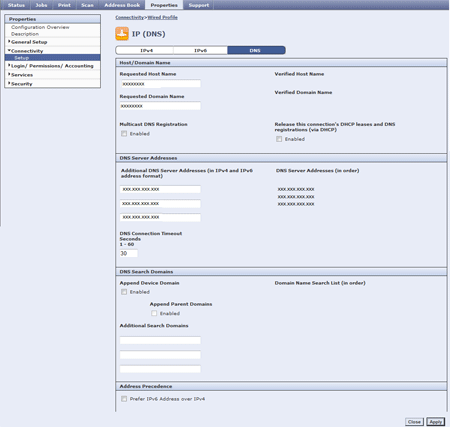
NOTE: The printer uses separate IPv4, IPv6, and DNS settings tabs on the IP (Internet Protocol) page for wired and wireless network connections. Before configuring wireless IP settings, install the Xerox Wireless Network Interface and connect to a wireless network.
NOTE: The printer does enable port 443 for SSL (encryption type) after clicking on edit to access the connect type profile page. If a screen warning screen appears depending on the web browser either select Continue Anyway or Proceed to continue to the Connectivity page.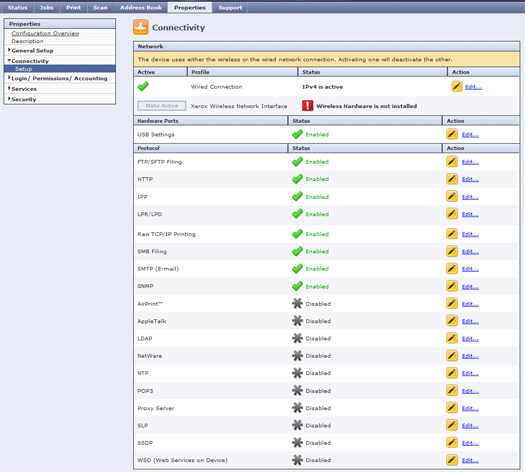
Click on Edit beside IP (Internet Protocol).
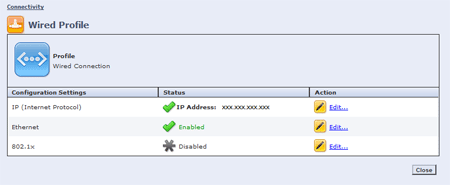
Click on the DNS tab or click the Show DNS Settings button.
Enter the hostname in the Requested Host Name field.
Enter the domain name in the Requested Domain Name field.
If necessary, click on Enabled from the Multicast DNS Registration section.
If necessary, click on Enabled from the Release this connections DHCP leases and DNS registrations (via DHCP) section.
Enter the DNS Server Address(es) in the provided field(s) from the DNS Server Addresses section.
Enter the number in the DNS Connection Timeout Seconds (1-60) section.
If necessary, click on Enabled from the Append Device Domain section under the DNS Search Domains section.
If necessary, click on Enabled from the Append Parent Domains section under the DNS Search Domains section.
If necessary, enter additional domains to search in the field(s) provided under the DNS Search Domains section.
If necessary, click on Prefer IPv6 Address over IPv4 check box from the Address Precedence section.
Click on Apply.