Connect the Printer to a Wired (Ethernet) Network
- Product support for
- VersaLink C8000 Color Printer, VersaLink C8000W Color Printer, VersaLink C9000 Color Printer
- Article ID
- KB0136334
- Published
- 2020-10-06
If your computer is connected to an office network or home network, use an Ethernet cable to connect the printer to the network. You cannot connect the printer directly to the computer via Ethernet. It must be connected through a router or network switch. An Ethernet network can be used for one or more computers and supports many printers and systems simultaneously. An Ethernet connection is typically faster than USB and allows you direct access to the settings of the printer using the Embedded Web Server.
NOTE: Routers, network switches, modems, Ethernet cables, and USB cables are not included with your printer and must be purchased separately.
To Connect the Printer to a Wired (Ethernet) Network
Ensure that the printer is powered off.
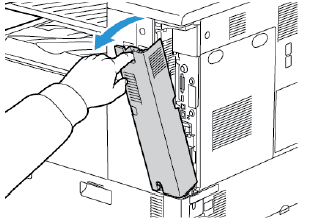
Remove the right rear cover. To remove the cover, pull the cover away from the printer.
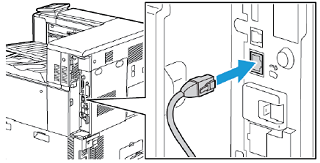
Attach a Category 5 or better Ethernet cable from the printer to the network or router socket. Use an Ethernet switch or router, and two or more Ethernet cables. Connect the computer to the switch or router with one cable, then connect the printer to the switch or router with the second cable. Connect to any port on the switch or router except the uplink port.
Replace the right rear cover. To replace the cover, position the tabs on each side of the cable and then raise the cover until it clicks into place.

Power the printer on.