Connect the Printer to a Wireless (Wi-Fi) Network Using the Xerox Easy Wireless Setup Program
- Product support for
- Xerox B210 Printer
- Article ID
- KB0326445
- Published
- 2021-05-24
Perform the following steps to use a wireless setup utility to connect the printer to a wireless network. The utility will walk you through the process to connect the printer to the Wi-Fi network from your computer. The utilities can be downloaded from the product’s drivers and downloads pages. The utilities can be downloaded from the product’s drivers and downloads pages on support.xerox.com.
IMPORTANT:
You cannot use your printer on a wired (Ethernet) and wireless network at the same time. If your printer is currently connected to the network with an Ethernet cable, unplug the cable.
A USB cable is temporarily needed to perform this solution. Make sure you have a functioning USB cable before you begin.
Do not connect the USB cable until instructed to do so in the steps below.
Follow the instructions here for Windows and Mac10.1.5 or higher OS.
To Connect the Printer to a Wireless Network using Xerox Easy Wireless Setup (for Windows PC and Mac 10.15 or higher)
Before you begin:
For Windows:
Make sure you have installed the Xerox_B210_Windows_PrintDriver_Utilities_Signed.zip utility pack for Windows. This package contains the wireless setup utility along with the print and scan drivers and Easy Printer Manager. The file is available on the product support webpage, or on the CD that was shipped with the printer.
Run the setup.exe.
Click on Software
Read and accept the license agreement
Click on Select Software in the menu
Check the box for Easy Wireless Setup
Click Next to install the Easy Wireless Setup utility
For Mac 10.15 or higher:
Download the WiFi Setting Utility for Mac 10.15 and Higher. Note: this is a standalone file that is not included in the print driver dmg. To locate it on the product’s driver and downloads page, filter for Utilities and Applications.
Install the program to your computer
Note: The below pictures are applicable to the Windows setup utility. Steps may differ slightly for Mac.
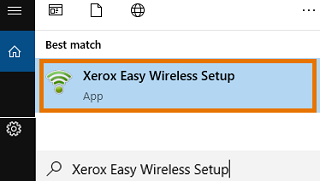
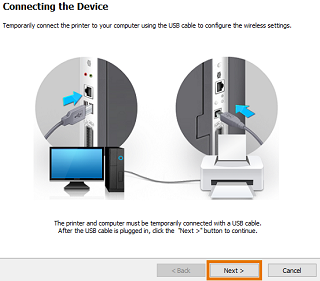
Open the Xerox Easy Wireless Setup program. At the computer, search for and select Xerox Easy Wireless Setup to open the program. The Connecting the Device screen will be displayed.
NOTE: If the program has not been installed, install the printer software from the CD that shipped with the printer using the "Connecting to a Local Printer" method. The software can also be downloaded from the Xerox Drivers and Downloads page.Temporarily connect the printer to your computer using the USB cable.
After the USB cable has been connected, select Next. The program will start to search for WLAN data.
When the search is complete, the Select Wireless Network window displays. Select your network from the list.
NOTE: If the network is not found, make sure the router is not set to the 5GHz wireless frequency. The router must be set to the 2.4GHz frequency as the printer does not support 5GHz. Contact your router manufacturer for additional information on how to configure the wireless frequency setting.Follow the wizard instruction to install the printer. The Wireless Network Security screen displays.
Enter your Network Password and select Next.
When the Wireless Network Setup Complete page displays, select Finish.
To Connect the Printer to a Wireless Network using Easy Printer Manager on Mac 10.14 or lower
Note: The Wireless Setup Utility is embedded in the Easy Printer Manager.
Before you begin:
Download the Xerox B210 MacOS Utilities Print Driver file from the product’s drivers and download page on support.xerox.com. The file contains the Easy Printer Manager.
Install the Easy Printer Manager application “_Printer Manager”
Make sure your printer is connected with a USB cable to your computer
Add the printer to the WiFi Network using Easy Printer Manager
Open Easy Printer Manager.
From your Printer List, select your printer
At the home screen, select Machine Settings
Select Network Settings
Under General, ensure Network Connectivity is set to Wireless
Under WiFI Settings, select Wizard
Follow the Wizard instructions to install your printer on WiFi