Configure Wi-Fi Direct Using CentreWare Internet Services (CWIS)
- Product support for
- Xerox B205 Multifunction Printer
- Article ID
- KB0325600
- Published
- 2019-08-22
Note: If you are accessing Xerox CentreWare Internet Services for the first time after printer installation, you will be prompted to change the default Administrator Account password. The initial default password is the printer serial number. For additional information refer toChange the System Administrator Password for CentreWare Internet Services (CWIS).
You can connect to your printer from a Wi-Fi mobile device, such as a tablet, computer, or smart phone, using Wi-Fi Direct.
Note: Wi-Fi Direct is disabled by default.
Configuring Wi-Fi Direct Using Xerox CentreWare Internet Services
From a computer (on the same network as the printer) open a Web browser.
In the Web browser address field, enter the IP address of the printer and then press Enter or Return. The CWIS home page will be displayed.
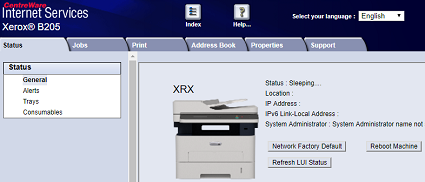
Click Properties.
Note: Many features in CWIS require an administrator user name and password to access or modify. If prompted to enter Administrator Account login details:For User Name, enter Admin.
For Password, enter the administrator account password that was set during initial access to CWIS.
Click OK.
Click Connectivity.
Click Protocols.
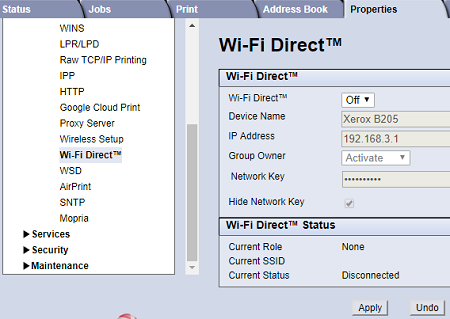
Click Wi-Fi Direct.
For Wi-Fi Direct, select On.
For Device Name, type a name to appear in a list of available wireless networks and devices.
For IP Address, use the default or type a new IP Address.
To set the printer as Group Owner for a Wi-Fi Direct group, similar to a wireless access point, select Activate.
Enter a Network Key or use the default value.
To hide the Network Key, select the check box.
Click Apply.