Configure AirPrint Using CentreWare Internet Services (CWIS)
- Product support for
- Xerox B210 Printer
- Article ID
- KB0327967
- Published
- 2020-06-26
Note: If you are accessing Xerox CentreWare Internet Services for the first time after printer installation, you will be prompted to change the default Administrator Account password. The initial default password is the printer serial number. For additional information refer to Change the System Administrator Password for CentreWare Internet Services (CWIS).
AirPrint is a software feature that allows for driverless printing from Apple iOS-based mobile devices and Macintosh OS-based devices. AirPrint-enabled printers let you print directly from a Macintosh or from an iPhone, iPad, or iPod touch.
Note:
AirPrint and all of required protocols are enabled by default.
Not all iOS applications support printing using AirPrint.
Wireless devices must join the same wireless network as the printer. A system administrator can connect the printer by its wired network interface.
The device that submits the AirPrint job must be on the same subnet as the printer. To allow devices to print from different subnets, configure your network to pass multicast DNS traffic across subnets.
AirPrint-enabled printers work with all models of iPad, iPhone (3GS or later), and iPod touch (3rd generation or later), running the latest version of iOS.
If connecting to a hot spot and Airprint fails to work, try connecting the printer and the iOS device to a different wireless network.
Configuring AirPrint Using Xerox CentreWare Internet Services
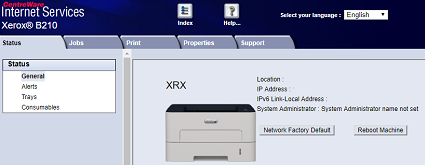
Note: The images in this procedure are for demonstration purposes only and may not specifically match your printer model; differences in colors, icons, available tabs/menus and supported options/settings may exist.
From a computer (on the same network as the printer) open a Web browser.
In the Web browser address field, enter the IP address of the printer and then press Enter or Return. The CWIS home page will be displayed.
Click Properties.
Note: Many features in CWIS require an administrator user name and password to access or modify. If prompted to enter Administrator Account login details:For User Name, enter Admin.
For Password, enter the administrator account password that was set during initial access to CWIS.
Click OK.
Click Connectivity.
Click Protocols.
Click AirPrint.
To configure HTTP settings, for HTTP, click Edit. For information refer toConfigure HTTP Settings Using CentreWare Internet Services (CWIS).
To configure IPP settings, for IPP, click Edit. For information refer toConfigure IPP Settings Using CentreWare Internet Services (CWIS).
To configure Multicast DNS (Bonjour), click Edit. For information refer toConfigure TCP/IP and DNS Settings Using CentreWare Internet Settings (CWIS).
To change the software upgrade setting, for Software Upgrades, click Details.
To add a device certificate, for Machine Digital Certificate, click Details.

To configure Protocol Settings, for Protocol, select Enabled. Configure the settings required:
For Bonjour Friendly name, click Edit. Enter required information in the filed provided, click Apply.
For Device Location, click Edit. Enter required information in the filed provided, click Apply.
For Geographic Location Name, click Edit. Enter required information in the filed provided, click Apply.
In the Optional Information area, to check consumables, click Supplies Details.
Click Apply.