Install or Remove the Optional Wireless Network Adapter
- Product support for
- WorkCentre 6515
- Article ID
- KB0230190
- Published
- 2018-04-02
To Install the Optional Wireless Network Adapter
Turn off the printer.

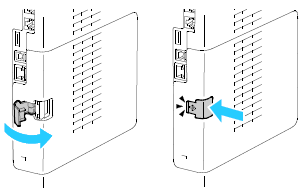
To remove the Wireless Network Adapter Port Cover, press down the latch and pull it away from the printer.
Remove the packaging from the Wireless Network Adapter.
To install the Wireless Network Adapter, follow the procedure defined on the instruction sheet provided with the Wireless Network Adapter.
CAUTION: Pulling on the adapter can damage it. Once installed, remove it only as needed using the instructions below.Turn on the printer.
To Remove the Optional Wireless Network Adapter
CAUTION: Once installed, remove the Wireless Network Adapter only as needed using the instructions below.
Turn off the printer.
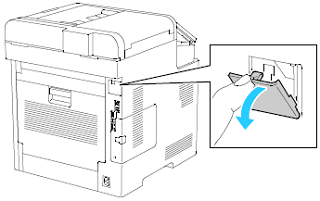
Unlatch the left-side cover by sliding out its handle away from the printer. Then swing the handle toward the rear of the printer.

To remove the cover, slide it toward the rear of the printer, then away from the printer.

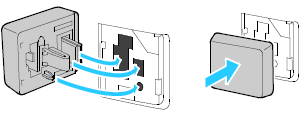
Reach into the printer and push the release lever toward the front of the printer. Hold the release lever in this position while pulling the Wireless Network Adapter away from the printer.

CAUTION: Do not use force to pull on the Wireless Network Adapter. If the latch is released properly, the adapter pulls out easily. Pulling on a secured adapter can damage it.Reinstall the Wireless Network Adapter Port Cover by inserting the bottom tab, then raising the top until it latches into place.
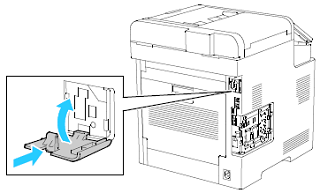
Place the left-side cover into place, then slide it toward the front of the printer.

To latch the cover, swing the handle toward the front of the printer. Then push the handle in until it clicks into the locked position.
Connect the printer to your computer with a USB cable or through the network using an Ethernet cable.

Turn on the printer.