Skip to main contentClick to view our Accessibility Statement or contact us with accessibility-related questions.

Modify the Date and Time

Product support for
Phaser 7800
Article ID
KB0091445
Published
2016-11-10
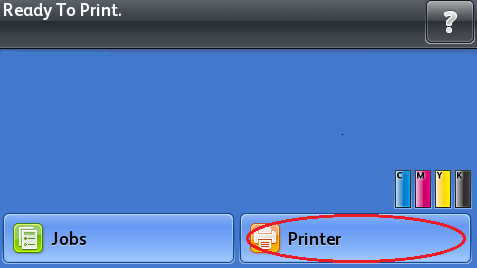
  1. Select [Printer] on the Touch Screen.

    Select Printer

  2. Select the [Tools] tab.
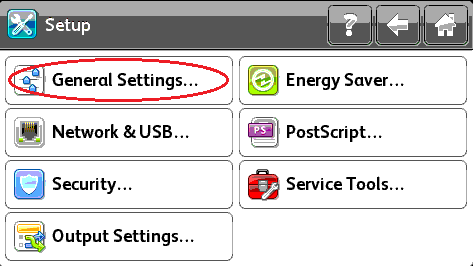
  3. Select [Setup].

    Select Tools, Setup

  4. Select [General Settings].

    Select General Settings

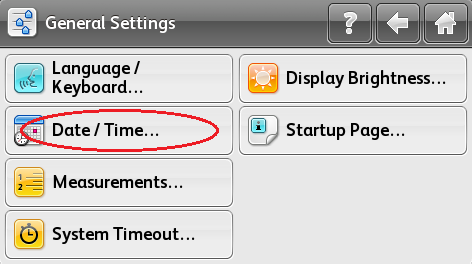
  5. Select [Date and Time].

    Select Date/Time

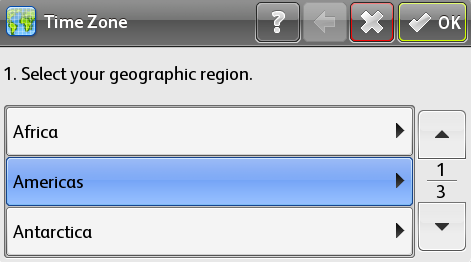
  6. Select [Time Zone], and then select required geographic region.

    Select geographic region

  7. Select the required time zone, and then select the [OK] button.

    Select your time zone

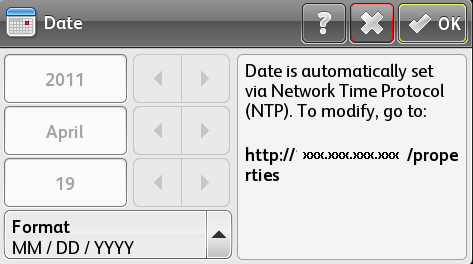
  8. Select [Date], select the required Date Format from the following options, and then select the [OK] button.

    • [MM / DD / YYYY]

    • [DD / MM / YYYY]

    • [YYYY / MM / DD]

      Select Date

    NOTE: By default, the Date and Time sections are unavailable (grayed out) as they are automatically set using the Network Time Protocol (NTP). To adjust these settings from the Control Panel, NTP must be disabled using CentreWare Internet Services (CWIS). See the Related Content for additional information.

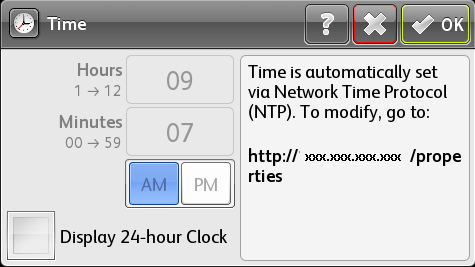
  9. Select [Time], then select [Display 24-hour Clock (if necessary), and then select the [OK] button.

    Select Time

  10. Select the [Home] button.

    Select Home


    Related Content