Replace the Waste Toner Container
Article: 2092541
Published:
CAUTION: Do not use warm water or cleaning solvents to remove Toner from your skin or clothing. This will set the Toner and make it difficult to remove. If any Toner gets on your skin or clothing, use a brush to remove the Toner, or wash it off with cold water and mild soap.
NOTE: The images in this procedure are for demonstration purposes only and may not specifically match your printer model; colors, icons, and other minor differences may exist.
A message will be displayed on the Control Panel when the Waste Toner Container needs to be replaced.
- As a precaution, spread paper on the floor in front of the Waste Toner Container area to catch any possible Toner spills.
- Make sure the machine has stopped copying / printing.
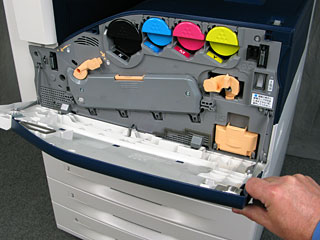
- Open the Front Cover of the printer.
- Remove the new container from the packaging. Retain the packaging.
- Pull the used container out of the printer slowly while supporting it with your other hand.

- Place the used container in the plastic bag, then seal it firmly using the zipper. Place the container in the empty box.
- Hold the left side of the new container and slide it into the printer until it clicks.
- Clean the printhead lenses.
- Turn the release lever on the left side of the Drum Cartridge Cover to the left to unlock the cover.
- Pull the Drum Cartridge Cover down until it clicks into the open position.
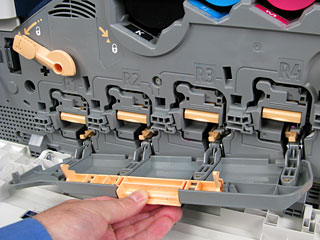
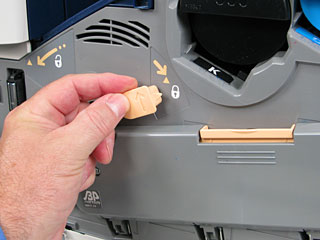
- Each of the four printheads has its own cleaning tool. Slowly pull the printhead lens cleaner out until the three dots are visible.
NOTE: The printhead lens cleaner does not detach from the printer. - Slowly push the printhead lens cleaner back into the printhead until it stops.
- Repeat these steps to clean each printhead.
- Lift up the Drum Cartridge Cover.

- Turn the release lever on the left side of the Drum Cartridge Cover to return it to the locked position.
- Turn the release lever on the left side of the Drum Cartridge Cover to the left to unlock the cover.
- Close the Front Cover.